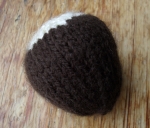
Hazelnut Knitting Pattern

I am making a story sack for one of my little monkeys favourite books and needed a nut, think this about fits the bill.

I used 3.25mm needles and dk yarn. You only need a tiny amount of each yarn and a small amount of stuffing. Finished nut is approx 2″


Using cream cast on 6 st.

Kfb to end (12st)

[K1, kfb] to end (18st)

[Kfb, p2] to end (24 st)

[K3, kfb] to end (30 st)

Switch to brown, leave tail in cream for sewing.

P 1 row

[K4, kfb] to end (36 st)

St st 5 rows

[K4, k2tog} to end (30 st)

St st 3 rows

[K3, k2tog] to end (24 st)

P 1 row

[K2, k2tog] to end (18 st)

[P2tog, p1] to end (12 st)

K2tog to end (6 st)

Break yarn, thread through remaining st and use to sew up side of nut. Stuff firmly, fasten off brown yarn and use tail end of cream to sew up remaining seam. All done!

First attempt at dying yarn!

Using koolaid and some help from knitty. It was loads of fun, just squishing it around and it looked fabulous drying on the washing line in the sun. Definately will be trying it again. Had to take it into the house to finish off drying and you could smell the koolaid every time you walked past, absolutely fab. I might even let the little monsters have a go next time, it would be nice to have some yarn they have dyed tho I would have to think up something really special to knit with it.

I love the colours but cant imagine what I am going to do with the yarn now, I rarely wear anything colourful or pastel so am thinking of adding it to the shop or using it as swaps or gifts.

Candy Cane Christmas Tree Decoration

Very simple knitted decoration for your tree or it could be sewn onto a stocking as decoration. You will need 2 double pointed needles and a small amount of red and white yarn, coloured ribbons if required. This can also be made using a knitting dolly or french knitting (I think thats what its called). Just make the tube of knitting the length you want and fasten off then shape as below.

This is simply an i-cord tube, shaped with a piece of wire or pipe  cleaner. I used 2 strands of double knit yarn held together and 5mm double point needles but you could use whatever yarn and needles you like, thinner needles or yarn will make the tube narrower and smaller which might work well if you want to sew it onto something as a decoration, you wouldnt need the wire then either, just sew it into shape. This candy cane is just over 4 inches in height.

If you havent done an i-cord before it is very simple and there is an excellent video at knittinghelp

Cast on 3 stitches in red.

Attach white yarn (if you do it now you can leave the end at the bottom of the piece of i-cord so it doesnt get in your way).

Knit 3 stitches in red.

Slide all stitches to end of needle, bring yarn round from last stitch firmly and knit again.

To ensure the yarn you are not currently using is carried up the middle of the tube, bring it over the left needle so it falls in front every time you slide the stitches to the end of the needle, then bring the yarn around the back of it to knit the next 3 stitches. Pull the yarn tight enough round the back so no hole is left. You are stretching the yarn round the back of the 3 stitches so you are knitting them in a circle.

To change colour twist the 2 yarns together and then start using the new colour, making sure the unused yarn is in front of the left needle.

Continue working 3 rows of each colour until you reach the desired length.

To finish off knit 3 together or if it is too tight slip 1, knit 2 tog then pass the slipped stitch over. Fasten off both yarns.

Shape the candy cane.

I used a piece of 0.8mm wire cut to the same length as the i-cord.

Using pliers grip the end of the wire and wrap it around the pliers to form a very small loop. This stops the end catching on the yarn.

Slip the wire through the yarn at one end of the i-cord so it slides through the middle of the tube and gently ease it all the way through.

Pipe cleaners can also be used and are probably better as they are less likely to slip out. However I didnt have any to hand so used wire and it feels fairly  secure. I WOULD NOT GIVE THIS TO  A SMALL CHILD AS A TOY! The end of the wire can be quite sharp, even pipe cleaners can be scratchy so please take care.

Bend the candy cane to the shape you want. Decorate with a ribbon bow if you like, sew a piece of thread through the top or tie the bow at the top and make a loop of ribbon to hang it from your tree.
Tooth Fairy Door Hanger To Sew

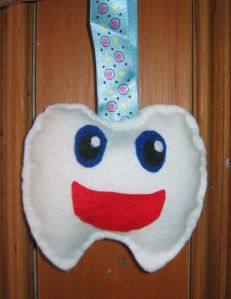
I dont do much sewing but would like to. I do sometimes make things out of felt and this is one such creation.

My darling baby had to have 2 teeth taken out the other day <sob> and all he seemed bothered about was the tooth fairy bringing him some pennies. He wasnt anything like as upset as me (which is good, I think).

So rather than let the tooth fairy wake him up in the night rummaging under his pillow (he is the lightest sleeper ever) I made this to hang on the door knob. I hope you like it and it can bring a bit of happiness to other gappy individuals.

toothy

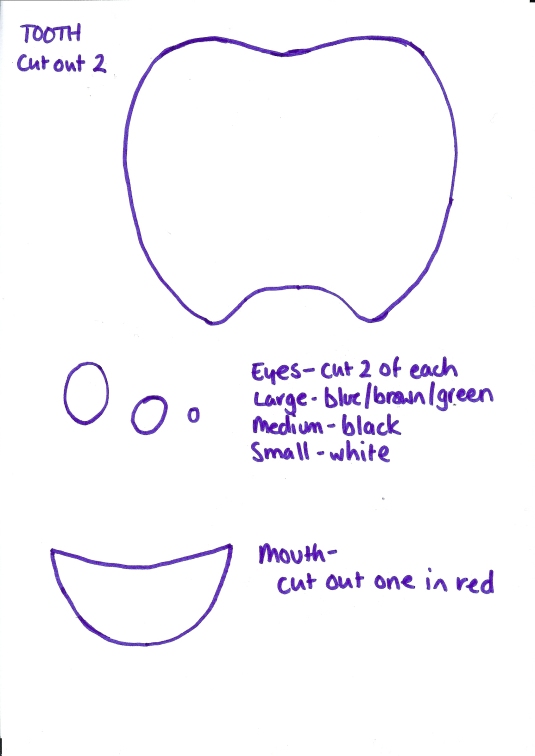
Copy and paste the picture below into something like word so you can print, the pic should be A4 sized to get a hanger the same size as mine. To do this you will have to reduce the margins and stretch the picture to fill the page.

You will need – Felt in white, eye colour of choice, black and red. Ribbon for hanging and toy stuffing (I cant find any near where I live so I bought a cheap cuchion and ripped it open).

tooth hanger

Instructions –

Cut out all pieces according to template (you dont really have to cut round the little white bit for the eye, thats just so you remember to make one). I used a simple running stitch to do all the sewing and doubled up the thread. I also used thread in the same colour as the piece I was sewing but you can get a nice effect using a contrasting colour.

Start with the eyes. Sew the white bit to the black bit then the black bit to the blue/green/brown/whatever colour eyes you want bit.

Position the eyes and the mouth on one of the tooth pieces and make sure you are happy. Pin them into position and stitch them on, you only stitch the bottom half of the mouth on as this is the pocket for teeth and money.

Then put the two white bits together. Put the ribbon in place NOW or you will end up cursing and unpicking to get back to that bit later (or perhaps thats just me).

Sew almost all the way round the tooth shape making sure the ribbon is very secure, I did 3 lines of stitching as small children have a habit of yanking things too hard if there is something they want inside.

When you have just a couple of inches left to stitch, stuff the tooth shape lightly. Then finish off the stitching and tidy up the ends of the thread.

Voila!

www.gigglinggoblin.co.uk

Its been a while

But I am still here and still knitting. And occasionally making jewellery but my current fave is knitting. I have been busy, I just havent taken photos but I do plan to put that right.

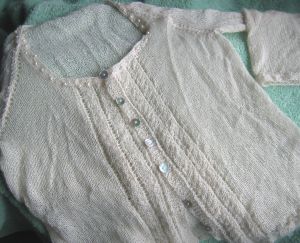
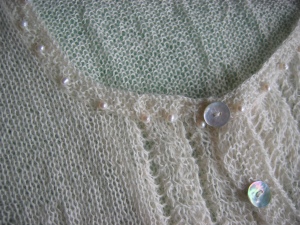
So the first project I want to show off is the cardi I made for my mums birthday. It is the first cabled project I have ever done and I was very surprised by how easy and non fiddly it was, non fiddly is good when you have an attention span as miniscule as mine.

The pattern is from Simply Knitting magazine issue 55, June 2009. The yarn is 2 ply baby alpaca knit on 4mm needles to give it a lovely airy feeling.

IMG_0418

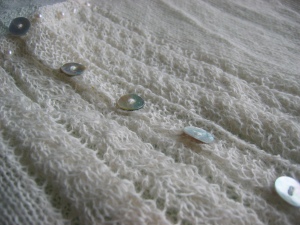
The cables run straight up the front, 2 either side of the buttons and have a lacy bit between them

IMG_0419

I replaced the suggested black beads around the neckline with 4mm freshwater pearl nuggets, you can see the lace panel better on this one

IMG_0420

Amigurumi Heart

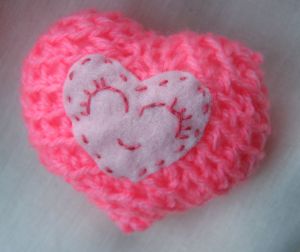
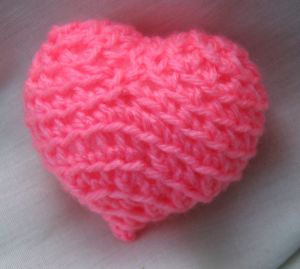
I have been playing with my crochet hook again this week and have come up with this little cutie. Am not sure the hook will ever completely replace my lovely pointy sticks but it is nice for a change. I also love embroidering on felt but for some reason never get round to it, possibly because it takes more concentration and by 7pm I am usually half asleep (thanks to the smallest monkey who seems to need 5 minutes sleep per night).  But this was fun and I am very happy with the result.

heartamiface

heartamigurumi

Hats for baby geeks or the more traditionally minded

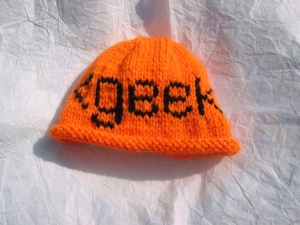
I love knitting baby hats but alas I have no more babies so I shall content myself with sticking them on  my etsy store

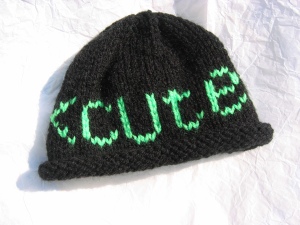
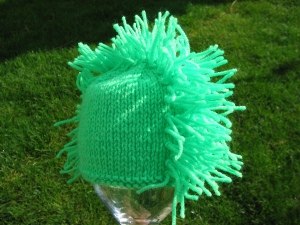
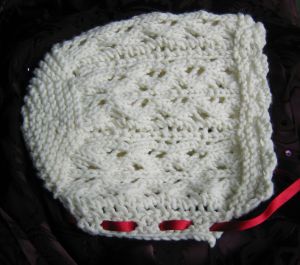
A few hats with html tags for the geeky among us, a mohican for the follically challenged baby with punky style and a more traditional victorian style baby bonnet because I wanted to have a go at knitting a lacy pattern.

geek4 cute3

mohican1 bonnet

PMC Blog Giveaway!

Not mine I’m afraid, I have yet to have a go at this.

Amazing giveaway going on over at Murano Silver blog , only question is do I really want to let more people know about it… hmmmmm……

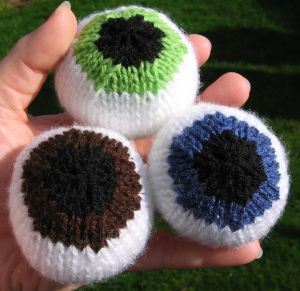
Knitted eyeball juggling balls

Stuff them with toy or cushion stuffing to make them nice and squishy soft, add a bag of dried lentils to weight them down or stuff them with cat nip for your favourite moggy

eyeballs

k – knit

p – purl

kfb – knit frotn & back. Knit the stitch as normal but do not slide it off the left needle. Bring the right needle round to the back of the stitch and knit it again, then slide it off. You have created 2 stitches from one.

k2tog – knit 2 together, put the right needle through 2 stitches at the same time and knit as normal.

p2tog – as k2tog put purl

st st – stocking stitch (knit one rowm purl one row)

st – stitch

Pattern- 4mm needles (US sizee 6) and dk yarn

Cast on 6 st  using white

Kfb to end (12)

[K1, kfb] to end (18)

[Kfb, p2] to end (24)

K1 row

[Kfb, p3] to end (30)

K 1 row

[Kfb, p4] to end(36)

st st 7 rows

[P2tog, p4] to end (30)

Change to colour for iris

K 1 row

[P2tog, p3] to end (24)

K1 row

Change to black for pupil

[P2tog, P2] to end (18)

[K1, k2tog] to end (12)

P2tog to end (6)

Thread yarn through remaining stitches and fasten off. Use tail ends in correct colours to sew down the side, remember to stuff before you close it up.

www.gigglinggoblin.co.uk

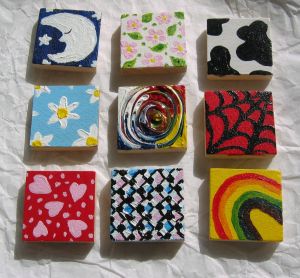
Painted Scrabble Tiles

I love painting but rarely get enough time. I had these scrabble tiles knocking about and thought they would be perfect for tiny painting projects! Now I just have to make them into something, probably pendants but maybe dolls house art?

scrabbletiles

Previous Older Entries